Mad Vrs Mad's Back Yard : Saint Augustine Sucks.
The first rule of buying plants for your new back yard paradise is
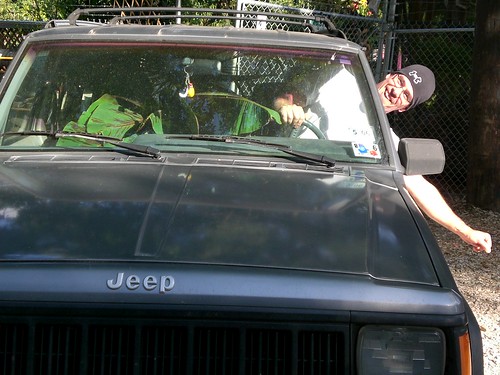
Making beds means getting rid of Saint Augustine and as you might expect, a saint like Augustine will not go quietly. My first thought was to hire a pack of Vandals to lay siege to my back yard. It was that or a shovel.
Turns out the Vandals were vanquished in 534. Who knew. A shovel it is.
Removing St Augustine by shovel really sucks. Eventually I decided to deploy the "Lawn Hog"!
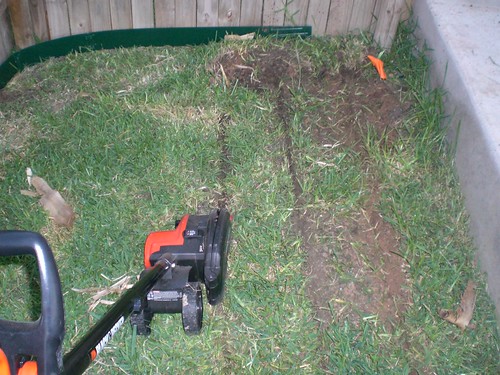
What a difference power tools make! The "Lawn Hog", aka Black-n-Decker's electric edger, has a trencher setting that let's you cut 1.5 inch deep trenches in sod. I know a 1.5 inch trench doesn't sound like much but it makes a huge difference.
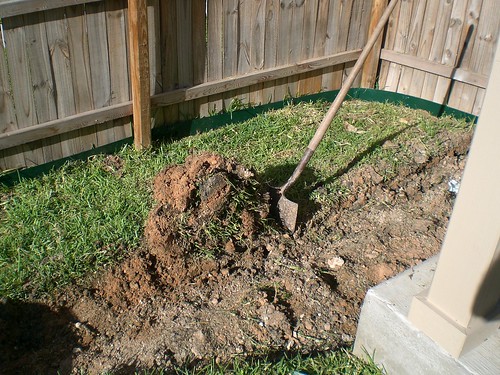
Start by using the Lawn Hog to cut rows in your sod between 8 and 10 inches in width. Next use your shovel to work along both sides of row of sod until you have freed it from the soil below. Starting at the end of the row, roll up the sod until you have removed about 5 feet of your row. You could roll up more, but sod is heavy - remember that landscaping is an endurence sport. Cut the roll away from the rest of the sod and toss it in your wheelbarrow.
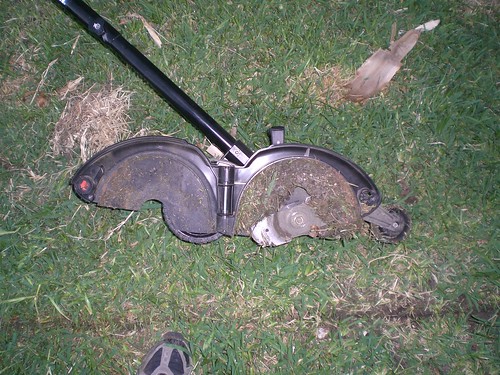
You will need to clean out the Lawn Hog every after every 10 to 20 feet of trenching. Make sure you unplug it before you stick your fingers into the blade area.
After just a few short hours of slightly less than back-breaking effort, you will think you are ready to start planting. You will, of course, be wrong!
After you have removed all the grass the next step is to put in the landscape edging. We recommend you buy the metal edging for use against your fence. Primarily because you can hit it with a hammer. Did I mention you will need a hammer?
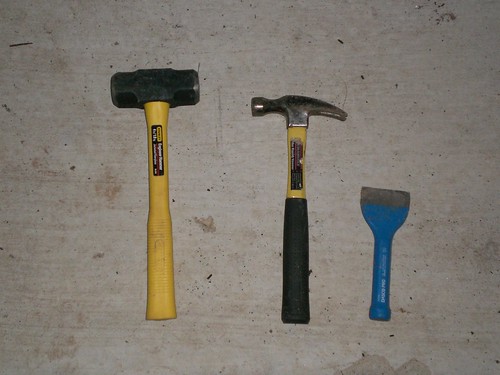
The hammer in the center is for pussies and carpenters. Don't buy it. What you want is a 3 pound masons hammer like the one on the left.
"Why?" You ask.
Simple. "Physics." Let's have a quick review:
Putting in landscaping edging along your fence is not a subtle job. Each of your fence post will be planted in concrete and you will need to remove some of that concrete in order to bury your edging. Start by putting the metal edging along the inside of your fence. Be sure to run the edging between the fence posts and the fence.
Next take your masons hammer and your masons chisel (the blue thing on the right in the last picture) and, as necessary, bang out enough concrete from each fence post to get an inch or two of your edging below ground. Then stake your edging down and level your bed.
Now you are ready to plant something. We recommend that if you paid more than $10.00 for the plant you are putting into your new bed, you actually take the time to read and follow the instructions that came with it. We have tried this both ways and we can say definitively that "Following planting instructions GOOD, Not following planting instructions BAD."
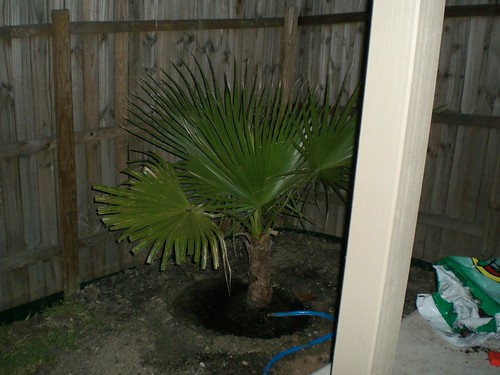
With any luck you will get your first plant into the ground and watered sometime around 10:00pm. Hopefully your new digital camera has a decent flash. Our's does (it's a Casio ZX-60, Costco had a sale) so you get one last picture.
"Make sure you already have beds to plant them in."The second ruled is :

"Make sure you leave enough room in the truck for the driver."Auto accidents and traffic citations aside, the first rule is really the most important.
Making beds means getting rid of Saint Augustine and as you might expect, a saint like Augustine will not go quietly. My first thought was to hire a pack of Vandals to lay siege to my back yard. It was that or a shovel.
Turns out the Vandals were vanquished in 534. Who knew. A shovel it is.
Removing St Augustine by shovel really sucks. Eventually I decided to deploy the "Lawn Hog"!

What a difference power tools make! The "Lawn Hog", aka Black-n-Decker's electric edger, has a trencher setting that let's you cut 1.5 inch deep trenches in sod. I know a 1.5 inch trench doesn't sound like much but it makes a huge difference.
Start by using the Lawn Hog to cut rows in your sod between 8 and 10 inches in width. Next use your shovel to work along both sides of row of sod until you have freed it from the soil below. Starting at the end of the row, roll up the sod until you have removed about 5 feet of your row. You could roll up more, but sod is heavy - remember that landscaping is an endurence sport. Cut the roll away from the rest of the sod and toss it in your wheelbarrow.

You will need to clean out the Lawn Hog every after every 10 to 20 feet of trenching. Make sure you unplug it before you stick your fingers into the blade area.

After just a few short hours of slightly less than back-breaking effort, you will think you are ready to start planting. You will, of course, be wrong!
After you have removed all the grass the next step is to put in the landscape edging. We recommend you buy the metal edging for use against your fence. Primarily because you can hit it with a hammer. Did I mention you will need a hammer?

The hammer in the center is for pussies and carpenters. Don't buy it. What you want is a 3 pound masons hammer like the one on the left.
"Why?" You ask.
Simple. "Physics." Let's have a quick review:
Newton's most important contribution to science was not gravity, calculus, or the laws of motion parts 1, 2, and 3. It is what has come to be called "Newton's 0th Law of Physics" which is commonly stated as :"For any real world problem P: your chances of resolving P are directly directly proportional to the amount of blunt force you can bring to bare on P."Or, as Newton himself used to say :"Whenever I'm flummoxed, the first thing I do is get out my big hammer and just whack the living shit out of whatever it is that's flummoxing me."
Putting in landscaping edging along your fence is not a subtle job. Each of your fence post will be planted in concrete and you will need to remove some of that concrete in order to bury your edging. Start by putting the metal edging along the inside of your fence. Be sure to run the edging between the fence posts and the fence.
Next take your masons hammer and your masons chisel (the blue thing on the right in the last picture) and, as necessary, bang out enough concrete from each fence post to get an inch or two of your edging below ground. Then stake your edging down and level your bed.
Now you are ready to plant something. We recommend that if you paid more than $10.00 for the plant you are putting into your new bed, you actually take the time to read and follow the instructions that came with it. We have tried this both ways and we can say definitively that "Following planting instructions GOOD, Not following planting instructions BAD."
With any luck you will get your first plant into the ground and watered sometime around 10:00pm. Hopefully your new digital camera has a decent flash. Our's does (it's a Casio ZX-60, Costco had a sale) so you get one last picture.


0 Comments:
Post a Comment
<< Home